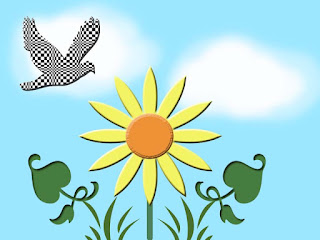
 To date all of you have learned some interesting Photoshop techniques; and you're doing a great job considering you just starting learning this program. This image-editing application is very extensive, and there are really too many things to learn; but I will try my best to explain to you the most relevant tips and ways to create "cool" digital art.
By now you should know how to create a new document in Photoshop (File-New or Command-N). You decide which size you want your document to be, but please pay attention to whether you are selecting pixels or inches. A document that is 800 x 600 pixels is a document of about 8 x 6 inches (when printed). Taking this in consideration, you can usually try to create documents that are less than a regular size page (8.5" x 11"). I suggest 8" x 10" or 7.5" x 10" or the other way around 10" x 8" or 10" by 7.5" - or if you want a square: 10" x 10" or 9" x 9." Also, you learned how to use some of the Photoshop Tools: like the Move Tool, the Magnetic Lasso Tool, the Eraser Tool, the Gradient Tool, the Paint Bucket Tool, etc.
You also learned how to select images using the Magnetic Lasso Tool and how to move them to a new or to another document (image). If you're having difficulties using this Lasso Tool - practice more! You should also know how to create a layer of your image-selection (Command-J). Remember: to move an image to another picture or document in Photoshop you don't need to create a layer first, just select the image with the Magnetic Lasso Tool and drag it with the Move Tool to your other document. You can also use the Rectangular Marquee Tool or the Elliptical Marquee Tool to select images (practice this as well).
Some of you already completed the Magical World Exercise. The idea was for your to practice selecting images and dragging them to the background of your choice. Also practice duplicating layers (the background layer or other). Practice changing the color of images or backgrounds (Command-U), and the sizes of images (Command-T). Also, using different filters. Another reminder: To use the "Free-Transform" - Command-T - you must press the Shift-Key if you don't want to change the proportions of your image. You can also use the "Free Transform" feature to rotate your images.
Like we did in class, you can select an image from a picture, using the Magnetic Lasso Tool, create a layer of it, change the background (with filters or gradients or styles), duplicate the image, change the color, create a collage, use many different backgrounds with the same images, etc. Get creative and practice a lot! If you have any questions, please do not hesitate to ask me. When you want me to print some of your digital art work, please let me know.
This week we will learn how to use the Brush Tool and the Custom Shape Tool in some interesting ways and a few other techniques that hopefully will motivate you to like Photoshop and Digital Art. You can even create your own brushes... You can add blending options to your images, like shadows, patterns, beveling and embossing, and also add text to your documents. There are many options, and even options within options...
You will work on the "Nine of Me" exercise too. If you didn't get a chance to create a "collage," I suggest you do so, it is a good way to practice using the Photoshop layers effectively and to practice how to select images, drag them to a new or other document, duplicate them, change the color, add filters (if you wish), etc.
You can go to Google, and look at samples of posters, book covers, magazine covers, ads and paintings by well-know artists (like Magritte or Dali) and get ideas for your projects. You can learn to add different images on a document and change the "opacity" (how transparent or light you want your image to be) - this is a great technique for posters.
I will also teach you how to create frames on your digital art creations. I hope you have fun and enjoy our Summer Enrichment Program! All the best!
